
Page 65 - Tạp chí bonsai cây cảnh BCI 2015Q2
P. 65
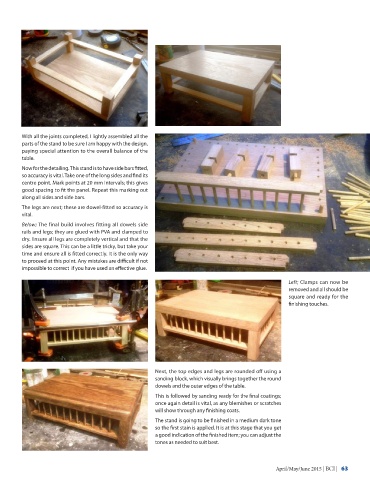
With all the joints completed, I lightly assembled all the
        parts of the stand to be sure I am happy with the design,
        paying special attention to the overall balance of the
        table.
        Now for the detailing. This stand is to have side bars fitted,
        so accuracy is vital. Take one of the long sides and find its
        centre point. Mark points at 20 mm intervals; this gives
        good spacing to fit the panel. Repeat this marking out
        along all sides and side bars.
        The legs are next; these are dowel-fitted so accuracy is
        vital.
        Below; The final build involves fitting all dowels side
        rails and legs; they are glued with PVA and clamped to
        dry. Ensure all legs are completely vertical and that the
        sides are square. This can be a little tricky, but take your
        time and ensure all is fitted correctly. It is the only way
        to proceed at this point. Any mistakes are difficult if not
        impossible to correct  if you have used an effective glue.

                                                                                                 Left; Clamps can now be
                                                                                                 removed and all should be
                                                                                                 square and ready for the
                                                                                                 finishing touches.


                                                    Next, the top edges and legs are rounded off using a
                                                    sanding block, which visually brings together the round
                                                    dowels and the outer edges of the table.
                                                    This is followed by sanding ready for the final coatings;
                                                    once again detail is vital, as any blemishes or scratches
                                                    will show through any finishing coats.
                                                    The stand is going to be finished in a medium dark tone
                                                    so the first stain is applied. It is at this stage that you get
                                                    a good indication of the finished item; you can adjust the
                                                    tones as needed to suit best.


                                                                                            April/May/June 2015 | BCI |    63