
Page 48 - Tạp chí bonsai cây cảnh BCI 2016Q4
P. 48
G H
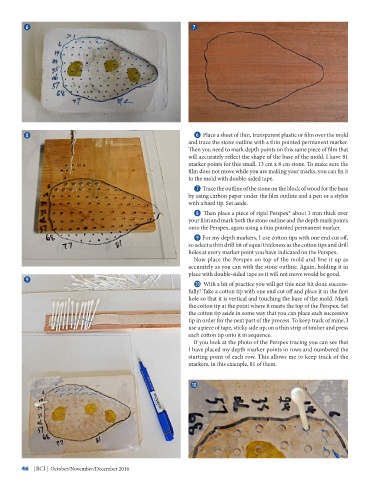
I G Place a sheet of thin, transparent plastic or film over the mold
and trace the stone outline with a thin pointed permanent marker.
Then you need to mark depth points on this same piece of film that
will accurately reflect the shape of the base of the mold. I have 81
marker points for this small, 13 cm x 8 cm stone. To make sure the
film does not move while you are making your marks, you can fix it
to the mold with double-sided tape.
H Trace the outline of the stone on the block of wood for the base
by using carbon paper under the film outline and a pen or a stylus
with a hard tip. Set aside.
I Then place a piece of rigid Perspex* about 3 mm thick over
your film and mark both the stone outline and the depth mark points
onto the Perspex, again using a thin pointed permanent marker.
J For my depth markers, I use cotton tips with one end cut off,
so select a thin drill bit of equal thickness as the cotton tips and drill
holes at every marker point you have indicated on the Perspex.
Now place the Perspex on top of the mold and line it up as
accurately as you can with the stone outline. Again, holding it in
place with double-sided tape so it will not move would be good.
J
1) With a bit of practice you will get this next bit done success-
fully! Take a cotton tip with one end cut off and place it in the first
hole so that it is vertical and touching the base of the mold. Mark
the cotton tip at the point where it meets the top of the Perspex. Set
the cotton tip aside in some way that you can place each successive
tip in order for the next part of the process. To keep track of mine, I
use a piece of tape, sticky side up, on a thin strip of timber and press
each cotton tip onto it in sequence.
If you look at the photo of the Perspex tracing you can see that
I have placed my depth marker points in rows and numbered the
starting point of each row. This allows me to keep track of the
markers, in this example, 81 of them.
1)
46 | BCI | October/November/December 2016