
Page 42 - Tạp chí bonsai cây cảnh BCI 2018Q1
P. 42
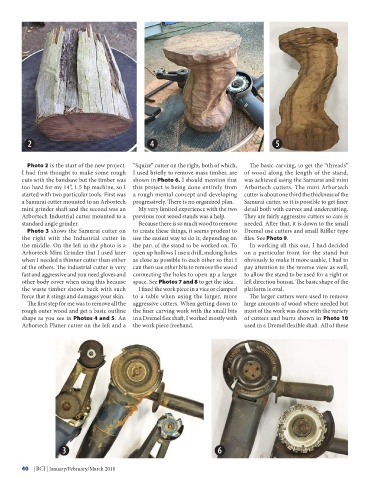
Photo 2 is the start of the new project.  “Squire” cutter on the right, both of which,   The basic carving, to get the “threads”
        I had first thought to make some rough  I used briefly to remove mass timber, are  of wood along the length of the stand,
        cuts with the bandsaw but the timber was  shown in Photo 6. I should mention that  was achieved using the Samurai and mini
        too hard for my 14”, 1.5 hp machine, so I  this project is being done entirely from  Arbortech cutters. The mini Arbortech
        started with two particular tools. First was  a rough mental concept and developing  cutter is about one third the thickness of the
        a Samurai cutter mounted to an Arbortech  progressively. There is no organized plan.  Samurai cutter, so it is possible to get finer
        mini grinder shaft and the second was an   My very limited experience with the two  detail both with curves and undercutting.
        Arbortech Industrial cutter mounted to a  previous root wood stands was a help.  They are fairly aggressive cutters so care is
        standard angle grinder.                Because there is so much wood to remove  needed. After that, it is down to the small
          Photo 3 shows the Samurai cutter on  to create these things, it seems prudent to  Dremel use cutters and small Riffler type
        the right with the Industrial cutter in  use the easiest way to do it, depending on  files. See Photo 9.
        the middle. On the left in the photo is a  the part of the stand to be worked on. To   In working all this out, I had decided
        Arbortech Mini Grinder that I used later  open up hollows I use a drill, making holes  on a particular front for the stand but
        when I needed a thinner cutter than either  as close as possible to each other so that I  obviously to make it more usable, I had to
        of the others. The industrial cutter is very  can then use other bits to remove the wood  pay attention to the reverse view as well,
        fast and aggressive and you need gloves and  connecting the holes to open up a larger  to allow the stand to be used for a right or
        other body cover when using this because  space. See Photos 7 and 8 to get the idea.  left direction bonsai. The basic shape of the
        the waste timber shoots back with such   I fixed the work piece in a vice or clamped  platform is oval.
        force that it stings and damages your skin.   to a table when using the larger, more   The larger cutters were used to remove
          The first step for me was to remove all the  aggressive cutters. When getting down to  large amounts of wood where needed but
        rough outer wood and get a basic outline  the finer carving work with the small bits  most of the work was done with the variety
        shape as you see in Photos 4 and 5. An  in a Dremel flex shaft, I worked mostly with  of cutters and burrs shown in Photo 10
        Arbortech Planer cutter on the left and a  the work piece freehand.       used in a Dremel flexible shaft. All of these


        40    | BCI | January/February/March 2018